
Master your drill bits, and your DIY game changes completely.
Drill bits might be small, but choosing the right one makes all the difference. Whether you're mounting curtain rods, assembling furniture, or finally tackling that metal garden trellis—you need to know what bit does what. The wrong bit can strip screws, split wood, or flat-out waste your time. Below is your no-fluff guide to understanding the different types of bits and how to use them without confusion.
Drill Bit Basics: Know Your Options
Before you even squeeze the trigger, you need to know what kind of job you’re doing and what surface you’re working with. Here's a quick breakdown of the main types of drill bits most DIYers encounter:
-
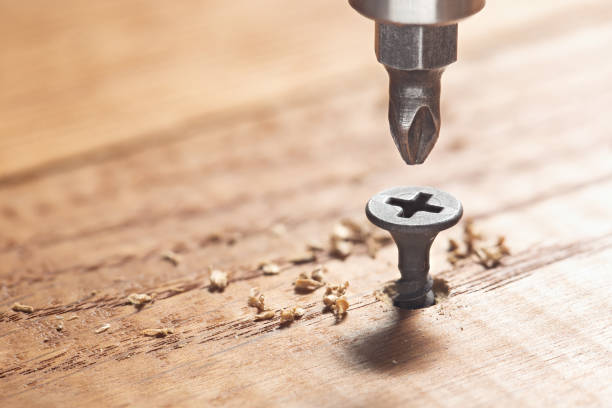
Screwdriver Bits
Designed for driving screws into wood, drywall, or plastic. These come in shapes like Phillips, flathead, Torx, and square. Use these with your home maintenance drill set to quickly assemble furniture or hang shelves. -
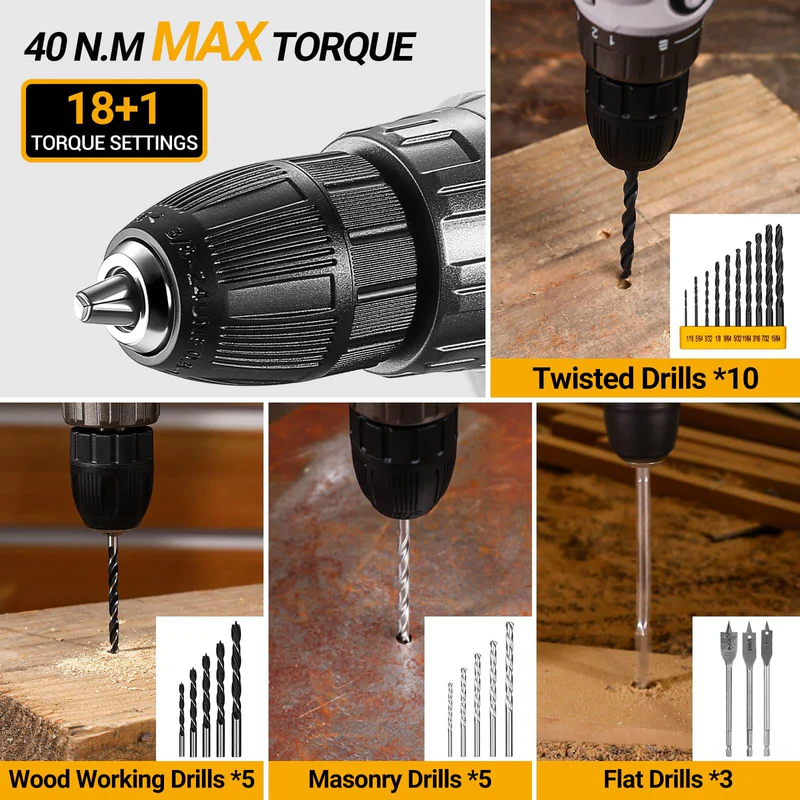
Twist Bits (aka General-Purpose Bits)
Great for beginners. Ideal for drilling small holes in wood or metal. Usually paired with a simple DIY project cordless drill. -
Brad Point Bits
Made specifically for wood. These have a sharp center point that keeps the bit from wandering, giving you clean, accurate holes. -
Spade Bits
Flat, paddle-shaped bits for boring large holes in wood—think running cords through the back of furniture or walls. -
Masonry Bits
For concrete, brick, and tile. You’ll need a drill with a hammer function for these, but they’re essential if you're mounting anything into brick walls. -
Metal Drill Bits (HSS – High-Speed Steel)
Needed when working with steel, aluminum, or even sheet metal. Keep it slow and steady with these and don’t forget a drop of oil for smoother cuts.
Matching Bits to Materials
Here’s a cheat sheet for when you’re unsure what to use:
|
Material |
Bit Type |
Pro Tip |
|
Drywall |
Phillips bit + twist bit |
Use anchors for heavier loads |
|
Softwood |
Brad point bit |
Tape your depth on the bit to avoid over-drilling |
|
Hardwood |
Brad point or spade |
Start with a small pilot hole |
|
Metal (thin) |
HSS bit |
Drill slowly to prevent heat buildup |
|
Brick/Concrete |
Masonry bit |
Use hammer mode and a wall anchor afterward |
Drill + Bit = Match Made in DIY Heaven
-
Using the wrong drill speed for your bit can burn out the tip—literally.
-
A lightweight drill for women or beginners typically offers a good balance of power and control for smaller bits.
-
For bigger jobs, a beginner cordless drill kit with variable speed settings lets you adapt to the bit and the job at hand.
Bit Tips You Don’t Want to Skip
-
Use a magnetic bit holder – Especially when driving screws in tight spaces.
-
Keep your bits organized – Many cordless drill kits (like DEKO’s 126-piece or 186-piece) come with labeled bit sets.
-
Sharpen your bits – Dull bits are dangerous and frustrating.
-
Always test your bit on scrap material first if you're unsure how it will perform.
DEKO’s Drill Kits: Bits Included & Beginner-Friendly
While there are a lot of bits out there, kits like the DEKO 126-piece home toolkit or 186-piece advanced toolkit come with a practical variety of screwdriver and drilling bits. Whether you're doing light repairs, setting up new furniture, or working on wood trim, these kits take the guesswork out of what you need.
They're designed to grow with you—from “wait, how do I use a drill?” to “yeah, I built that.”
Getting It Right: How to Actually Use Your Drill Bits Without Screwing Things Up
Choosing the right bit is only half the battle. If you've ever stripped a screw, split a board, or smoked a metal bit in 20 seconds flat, you know what happens when good bits go bad. Don’t sweat it—here’s your go-to guide for actually using your bits the smart way.
Know Your Drill Settings
Before drilling anything, take a second to get familiar with your drill’s basic controls. Most drills—even the beginner cordless drill kit options—will offer:
-
Torque settings (on the numbered ring): Lower numbers = lighter force for screws. Higher = more twist for tougher materials.
-
Speed settings: Most drills have two gears. Use the lower gear for screwdriving and thicker materials. Higher gear = faster, better for wood.
-
Forward/reverse toggle: Clockwise to drive, counter-clockwise to remove screws or back out of holes.
✅ Pro Tip: For DIY furniture assembly, like IKEA builds or bookshelves, keep your torque low until you’re sure the screw is set in properly. Then go higher if needed.
When & Why to Drill Pilot Holes
One of the most common beginner mistakes? Skipping the pilot hole. You don’t always need one, but here’s when you do:
-
Screwing into hardwood like oak, walnut, or maple.
-
Using long screws (2” and above) in any material.
-
Preventing wood from splitting, especially near edges.
Pilot holes give your screw a path to follow. Just grab a simple power drill, a bit slightly smaller than the screw’s body (not including the threads), and drill a quick guide hole. This tip alone will save your sanity and your wood.
Wood Drilling Tips (And What Not to Overlook)
When it comes to drilling into wood, especially furniture-grade wood or softer pine, technique matters:
-
Clamp your work: Always. Even if you think you don’t need to.
-
Use brad point bits for clean, splinter-free holes.
-
Tape your bit to mark depth if you're not using a stopper.
-
Drill in stages: Start slow, increase speed gradually.
-
Let the drill do the work: Don’t force it—especially with cordless drill kit for apartments where power is balanced for compact use.
This is especially useful for simple DIY projects with a cordless drill, like floating shelves, small desks, and closet organizers.
Tips for Metal Drilling Without the Drama
Drilling through metal? You’ll need patience, the right bit, and the correct drill speed.
-
Use HSS (high-speed steel) bits—these are built to handle aluminum, copper, and thin steel.
-
Apply light pressure and go slow—heat builds up fast.
-
Use a drop of cutting oil to reduce friction and extend the life of the bit.
-
Let the bit cool between holes, especially with thinner metal.
-
Clamp down your work tight so it doesn’t spin.
Metal drilling how-to hack: Mark your start point with a punch or nail to prevent the bit from “walking.”
Screwdriver Bits: Yes, There’s a Right One
If your screw keeps camming out or stripping, you’re probably using the wrong bit. For smooth screwing (yes, pun intended), match the bit to the screw:
|
Screw Head |
Matching Bit |
Common Use |
|
Phillips |
Phillips Bit |
Furniture, drywall, shelving |
|
Flathead |
Slotted Bit |
Outlet covers, antique hardware |
|
Torx |
Torx Bit (T10–T30) |
Automotive, tools, secure installations |
|
Square (Robertson) |
Square Bit |
Decking, cabinetry |
The DEKO 126-piece tool kit comes pre-loaded with the most common screwdriving bits, so you won’t have to scramble last minute during a project.

Make the Most of Your Kit: Stay Organized, Stay Ready
Don’t toss your bits into a junk drawer—respect your tools and they’ll last.
-
Label your case if it’s not already marked.
-
Group bits by material: wood, metal, screws.
-
Use a magnetic tray or bit holder for active projects so you’re not digging through boxes every 3 minutes.
-
If you're working in a tight apartment, the DEKO 186-piece toolkit has compact bit storage that makes it easy to grab-and-go.
Bonus tip: Keep a dedicated box for “junk bits” that are chipped, dull, or unfit for precision jobs. These are fine for rough work or dirty repairs.


